Showing posts with label pickled salad. Show all posts
Tuesday, February 2, 2016

recipe of pickled radish and making paratha meals healthier | radish leaves stir fry on the side


Pickled vegetables may be the way you can include more vegetables in your everyday diet with much ease possibly. This is for those who hate eating vegetables normally.

You do consume a bit of salt along with pickled vegetables but you can adjust the salt at the time of serving by adding a few elements to balance.

Normally pickled vegetables shouldn't make the staple vegetable intake but since pickling in certain ways causes fermentation and makes the pickle probiotic by lacto-fermentation, it is worth adding some pickled vegetables as a side dish or even in salads to bring some punch.

What is more interesting to know that this way you get cheap home cultured probiotics and once you use some fresh vegetables and whole grains in the meal you feed some prebiotics to your gut flora too. A healthy gut flora is the key to good health.

Moreover, you can pickle almost all vegetables you get in any season and pickling can be an all year activity on your kitchen counter. Each season has something delicious to pickle. I will definitely keep posting more recipes of probiotic pickles for you all.


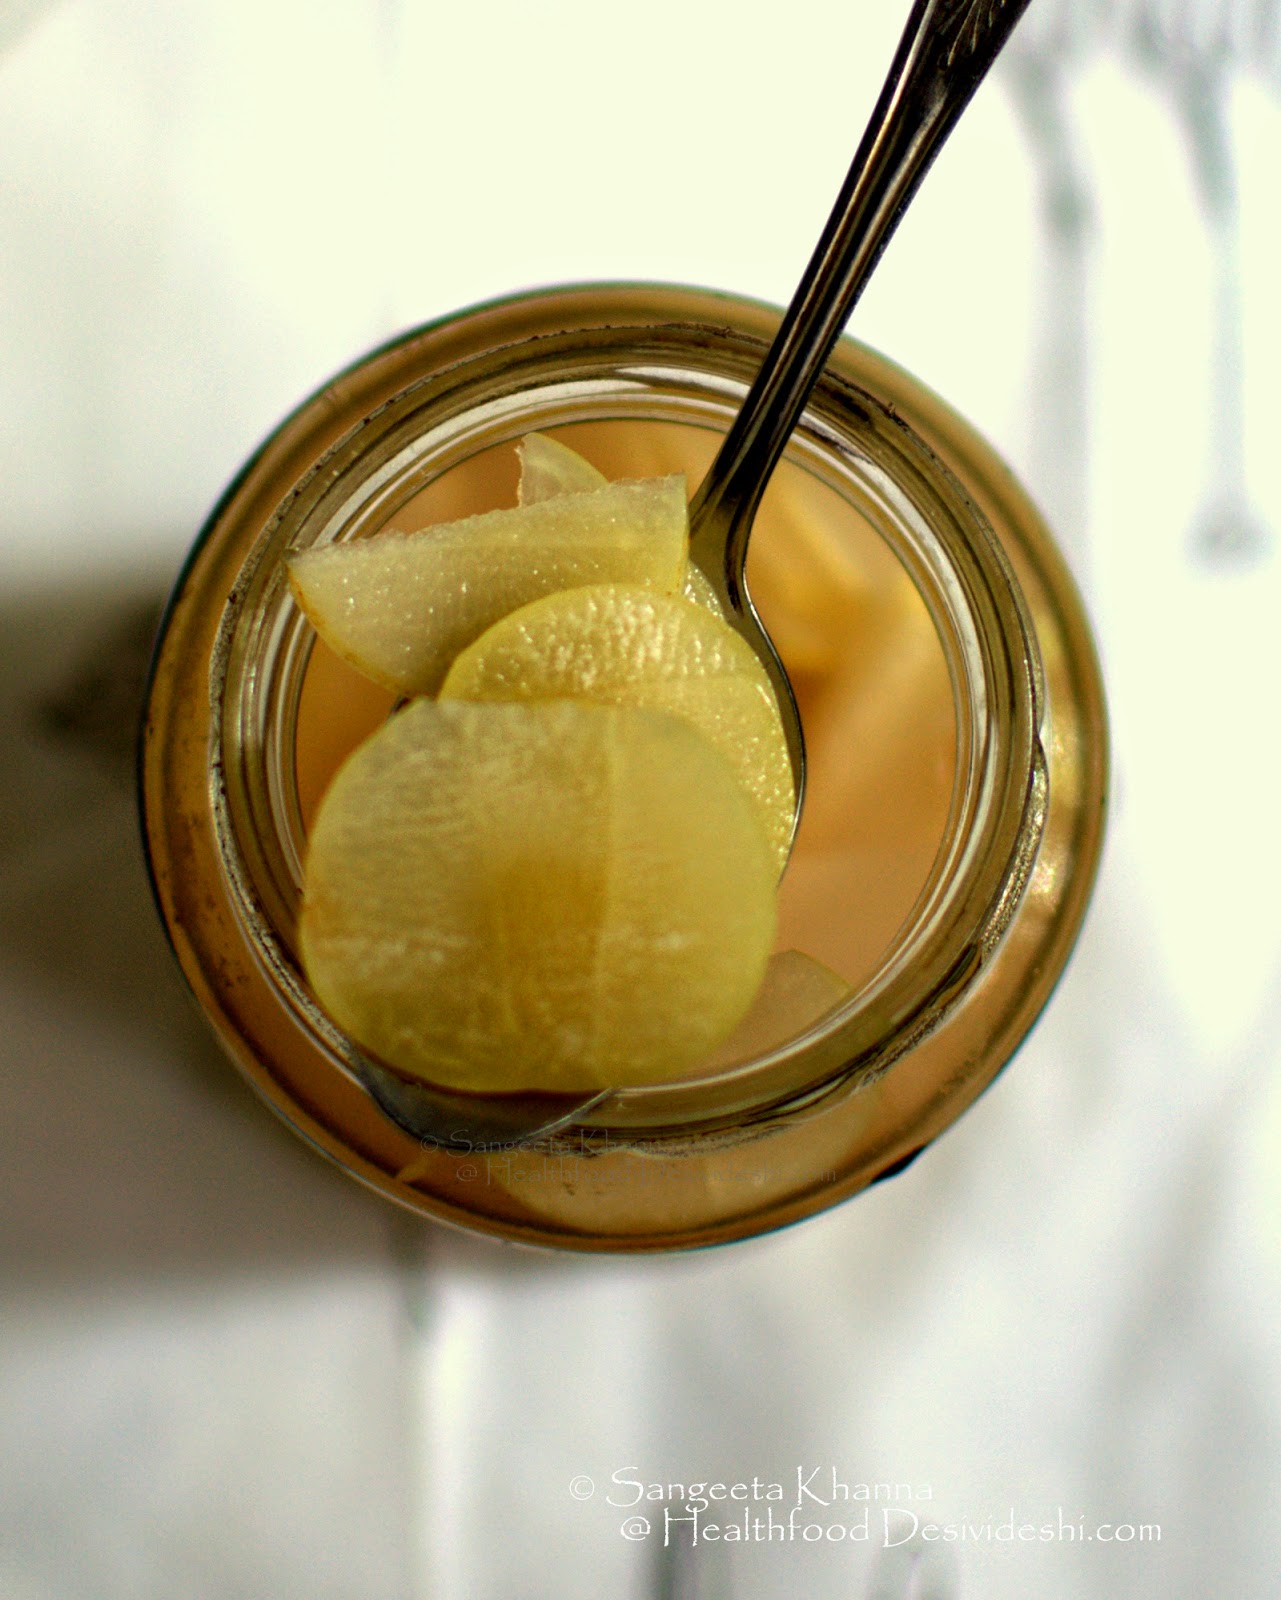
Right now the winter months bring these gorgeous red radishes and I love pickling them in so many ways. The mustard pickled radish is one of the favorite way to pickle the mature radishes, the tender ones go into this brined pickle that I love heaping my plate with.

You know this way one can balance the meals. I usually make methi paratha using millet flours (mostly a mix of sorghum, amaranth and barley flour) or I add some whole chickpeas flour to the mix sometimes. The paratha is always made in ghee and is served with some full fat home cultured yogurt.

See how in this platter I have combined the paratha meal with a roasted tomato and coriander leaves chutney, some yogurt, some amla subzi (recipe will be shared soon) and loads of pickled radish.
 

Paratha is anyways healthy if served rightly, but this millet paratha meal has so much vegetables and fiber from whole grains packed into one meal that it makes the meal low glycemic and safe even for those who want to manage diabetes or weight related goals.

Don't worry about the apparent lack of proteins in this meal as sorghum, amaranth and chickpeas are quite a good source of proteins for normal people. Yogurt of course fills in.

Recipe of red radish brined pickle 

ingredients 

3 large radishes (preferably red) almost 600 gm
500-700 ml water (quantity of water used depends upon how you chop the radishes and how packed they are in the jar)
1 tsp sea salt
1 tsp sugar
1 tsp whole peppercorns

procedure

Clean, wash and chop the radishes in batons. The batons can be according to the size of the jar you want to stack them into. Or slice them if you like. Stack the batons into clean sterilized glass jars.

Heat the water with the rest of the ingredients till it boils for a couple of minutes. Cool down to room temperature and pour over the radish batons stacked in jars. You may need more water if the batons are packed loosely.

Cover the lid and let the radishes pickle on your kitchen platform for at least 24 hours before serving. The taste and texture stays crisp for about 2 days but it depends on the temperature so refrigerate as soon as the radish batons start getting too soggy. It will still be edible when it gets soggy though.

Serve this radish pickle on the side of an Indian meal or with burgers if you like or inside sandwiches or any which way you like. You might end up munching on them as is.

A great way to consume this radish pickle is to add it to some salad. The pickling liquid will serve as a nice dressing too is mixed with some olive oil etc.

The leaves of the radish make wonderful stir fry that we love as stuffing to our parathas or chapati rolls. The recipe of the radish leaves stir fry is simple.


Recipe of radish leaves stir fry 

Just heat some mustard oil (or use any other oil you wish) and tip in some ajwain seeds (Omum seeds), broken dry red chillies and chopped garlic to it. Let them sizzle and then add the chopped leaves of radish. Add salt, mix, cover and cook till the volume is reduced. Then stir and cook for a couple of minutes till the stir fry gets a little dry. 

Add everything to taste, the mustard oil brings much flavour to this stir fry we call mooli ki bhurji. The best taste of this bhurji comes when you use red radish leaves but any radish leaves are good. Add some bits of radish too if you want more of this bhurji to savour.


All such leafy greens are great prebiotic foods and if consumed with whole grains and some proteins they make balanced meals.

You see when such parathas are made using alternative flours they can be a meal in itself. And when these paratha meals are served along with some of these probiotic pickles, some full fat yogurt and may be some more vegetables or chutneys or dips on the side they make a satiating and filling meal that keeps you full till the next meal and you don't end up snacking on nonsense things in between.


Oh and the leftover parathas once quartered and reheated on the griddle make nice tea time snack if you wish. eating healthy is not much of an effort if you plan ahead and keep the ingredients clean and simple.

So make your paratha meals healthier with these probiotic salads of the season. Add more vegetable in every meal and see how your body thanks you in return. Say yes to a big paratha meal any day.

Saturday, January 16, 2016

winter pickles from north India | pickled seasonal vegetables | pickled salads using mustard as pickling spice


north Indian winter pickles

Pickling is a culinary art that has developed all over the world picking up flavours of the region. I often wonder how man started pickling so many things and so beautifully but being a fermentation enthusiast I know where it all started.

Fresh produce was a luxury and whatever the people grew in one season would not be available in the next. All the surplus fresh produce was always preserved in some way or the other and we have witnessed how sun drying, smoking and pickling has solved food problem across the world. Sauerkraut, Kimchi, Umeboshi, Sakura and all sorts of brined pickles are a testimony of how pickles have been an integral part of life all over the world.

pickles

In India we have so many variants of pickles made using spices and without spices, with oil or without oil and every season has a different produce to be pickled. Some of these pickles are made in such a way that they last several years but since it is a common practice to make pickles every season they are made just enough to last one year. Unless it is a pickle that is considered medicinal in it's aged form.

One of the aged pickles very popular in my region is the nimbu ka achar (called as nibuki in local parlance) which is basically brined limes, whole or quartered. It is given to someone with upset stomach with a thin mung ki khichdi and some fresh homemade (cultured) yogurt.

nimbu ka achar

I have shared some brined pickles like this amla and ginger pickled in brine. Another is this wild fig pickled in brine.

One of the variety of seasonal pickles is mustard fermented pickles, very popular in winters as the seasonal produce responds well to this method of pickling and traditional winter meals also pair well with these mustard fermented pickles. These pickles are also called as pani ka achar (watery pickle) in my part of the world for obvious reasons.

winter pickles

Yes, mustard helps fermentation along with red chilly powder (much like Korean Gochugaru) and we make kanji using the same method in a watery medium. For the seasonal vegetables to be pickled we don't add any water because the vegetables have enough water in themselves to let the flavours soak in.

amla turmeric and ginger pickle

Beautiful play of osmotic pressure in these pickles that is utilised for culinary use since ages.

The mix of mustard, red chillies, turmeric powder and salt is immensely medicinal as well. Mustard is known to improve metabolic rate and as an anti inflammatory agent, it improves blood circulation and is antiseptic too. Turmeric is another antiseptic herb that is antioxidant rich, anti inflammatory, analgesic and antiseptic. Red chillies are known as powerful analgesic and anti inflammatory because the capsaicin improves blood circulation, helping the body to heal naturally. 

With so much goodness these pickles are indeed quite healthy. To add to the health quotient of these pickles the fermentation process makes them probiotic too. What an easy way to get wholesome nutrition and healing benefits from homely pickles.

The good thing is that you can use almost every vegetable to make these pickles. Traditionally the gourd family vegetables are not pickled but once you get the hang of it you might want to try those too. These pickles are made during winters mostly, probably because they aid in digestion and help the gut health too. Traditionally winters means heavier foods and increased consumption of ghee and fried food that tastes really great with these pickles I must add. The traditions develop for a reason of course.

seasonal vegetables

The vegetables that are used for this kind of pickling are mostly root vegetables, ginger, fresh turmeric, some beans specially the flat variety, cauliflowers, some leafy greens like chickpea shoots and even fresh green peas or soaked chickpeas.

This mustard fermented pickle is made in the north India. The vegetables being pickled may differ in different regions. Gajar-Gobhi ka achar (pickled carrots and cauliflowers) and mooli ka achar is staple in Punjab while hari mirch ka achar (pickled green chillies) is from Rajasthan. In Uttar Pradesh we pickle a lot of vegetables this way.

Many families will add some soaked chickpeas to the jar of pickles when it is just about to finish to make it last longer. I like adding some fresh peas too.

How to make the winter vegetable pickles with mustard...

While the pickling spices remain the same in these pickles that is mustard, turmeric, chilli powder and salt, the procedure differs with different vegetables as some of the vegetables have higher water content some are dry. Also because some of the vegetables we like crunchy and some others are preferred a bit softer. I have listed the recipes of some of the pickles I have been making.

Amla Haldi Adrak ka achar (amla, fresh turmeric root and ginger root pickle)...

amla turmeric and ginger pickle

ingredients 
(to fill 2 jars measuring 500 ml)

12 amla cut into wedges
12 large sized green chillies, preferably mild hot (bhajiya mirchi works in India, try Jalapeno or Anaheim or Banana peppers whatever available in your part of the world)
about 150 gms of ginger root cleaned and sliced
about 150 gms of fresh turmeric root cleaned and sliced
3 tbsp mustard powder (yellow or black)
1 tbsp turmeric powder
1 tsp red chilly powder
salt to taste or about 1 tbsp

procedure 

Slice and chop everything as desired and mix with all the ingredients in a glass bowl. Give a good toss and fill in clean jars.

This pickle is ready to eat in about 3 hours and keeps changing in taste for 2-3 days. In Indian summers we keep it only for 2 days at room temperature and then refrigerate. The pickle keeps maturing slowly and get sharper in taste by time.

If refrigerated it lasts about 4 weeks.

Sem aur hari matar ka achar (flat beans and fresh green peas pickle) ...

Not many people make pickle using flat beans but it tastes really good. I like it with green peas and sometimes with added cauliflowers and broccoli etc.

The reason for pairing these vegetables together is because these vegetables need a parboiling treatment unlike the root vegetables or amla or green chilies etc.

pickled flat beans

ingredients 
(to make a jar full, measuring 1 liter)

500 gm flat beans or mixed vegetables
200 gm green peas or soaked chickpeas
4 tbsp mustard powder (yellow or black)
1.5 tbsp turmeric powder
1 tbsp red chilly powder
1.5 tbsp salt or to taste

procedure 

Prepare the vegetables first. Beans, cauliflowers or broccoli need a little blanching or parboiling depending on what texture you like.

String the flat beans and split them open. Cut them in pieces if you wish. Using tender beans is desirable.

If using cauliflowers or broccoli, separate the florets.

Boil water in a large pan and dunk everything together. Add the peas too along with everything else and wait till the water comes to a rolling boil once again. Drain the water in a colander and empty the vegetables into a mixing bowl.

Add the spice mix and toss. Fill in clean jars. The pickle will be ready after 12-15 hours and will stay good for 2 days at room temperature and should be refrigerated after that. Make small quantity if you want to keep the jars on the dining table.

carrots, knol khol or radish pickle in mustard ...

These vegetables can be pickled together like a mixed pickle or can be pickled separately as I do. I want the vegetables to maintain their own flavours and I love them this way as a salad in generous helping.

See how I eat the knol khol pickle with my meals. You can see laal chowli and rocket stew, black sorghum roti and loads of pickled salad on my plate.

pickled knol khol

The radish pickle has been shared earlier. I like to toss this pickle into my sprouts or boiled chickpeas salads as shown here.

This radish pickle is in fact a great way to use up any mature radishes. The mature radishes soak up the flavours faster and give a good bite to the pickle.

You can make the radish pickle using any kind of radish available.

pickled radish

I often use mixed carrots to make the carrot version of this pickle and have experienced that the mature and large carrots taste better in this pickle.

Here I have used black carrots that are normally used for making kanji along with the red carrots that are normally used for making gajar ka halwa.

mixed carrot pickle

ingredients for making carrot, knol khol or radish pickle in mustard...

500 gm of any of these vegetables cut in batons or cubes
2-3 tbsp mustard powder
1 tbsp turmeric powder
1 tsp chilli powder (a little more for carrots)
1 tbsp salt

procedure

Mix everything up and fill in clean jars. These vegetables soak up the flavours faster and get ready to eat in 2-3 hours. You can wait for 2 days to get the sour flavour and then refrigerate for 3-4 weeks.

We even pickle boiled potatoes this way but the pickled (boiled) potatoes do not stay for long. Once made the pickle is ready to eat instantly and can be kept on the dining table (room temperature) for 2 days in winters and for a day in summers.

Luckily I found this boiled potato and chickpea shoots pickled with mustard. In my family the chickpea shoots (chane ka saag) was not pickled but once I was talking to Arvind's aunt and she told me they pickle chane ka saag this way. So next time I found some chane ka saag I wanted to try this.

The chane ke saag ka achar was so good I started combining it with the boiled potato version. It gets over quickly whenever I make it.

I would suggest to make this version just enough for a day's worth.

Chane ke saag aur alu ka achar (chickpea greens and boiled potatoes pickled with mustard)...

alu aur chane ke saag ka achar

ingredients 

250 gm boiled, peeled and cubed potatoes
100 gm washed, drained and finely chopped chickpea greens (chane ka saag) or use baby spinach
1 tbsp mustard powder
1 tsp turmeric powder
chilly powder to taste or minced green chillies (I used green)
salt to taste

procedure

Toss everything together and mix well. Keep covered for an hour before serving.

This is actually a wonderful potato salad that I love making whenever I get hold of chane ka saag.

Actually I call all these mustard based pickles as pickled salads as these can be served just like the salads or kachumbers we serve with Indian meals. I make more pickled salads if you want to check out. 

If mixed with some sprouts or boiled chickpeas or even some paneer, these salads can become a salad meal. See how I mix them up to make my meals here.

These salads are generally called as pani ka achar in Uttar Pradesh as I mentioned. The reason being there is no oil used in this pickle while other Indian pickles use oil to preserve the pickle for long.

You see you can pickle almost everything and have a great value out of your pickling efforts. These pickles are easy and cheap, provide great nourishment and also help heal the body, especially the gut. More reasons to make them as soon as possible.

Do let me know whenever you make them.

Friday, November 14, 2014

fermented foods | amla or Indian gooseberry in brine | the best way to make brine fermented pickles


I have been using the Indian Gooseberry aka Amla or Aonla as it is called in Hindi, a lot these days. Amla starts appearing in the markets in the autumn season and keeps coming till the winter lasts. As if to provide immunity towards winter ailments in the country where winter can be really harsh and there are no central heating in homes. Winters are short but come with a few ailments thanks to lowered immunity during this time. Amla helps boost immunity but there are many people who don't like the taste of amla and completely ignore this seasonal bounty of nature.

While we love the boiled amla chutney and instant amla pickle (amle ka achar) along with random green chutneys made with coriander and mint greens and a few amla berries thrown in, there are people who detest the slightly astringent taste of amla. This amla coconut chutney is one where nobody has detected presence of amla as yet, the chutney is served with idli and dosa.

Some readers on my facebook page (Healthy Living With Sangeeta Khanna) asked me how to make brined amla so everyone in the family can eat it regularly and I was reminded of the brined amla I had tasted at a Maharashtrian friend of mine. Those were small amlas, brined whole in heavily salted brine that they serve to start with the meal as a palate cleanser and digestive.

Later I tried with segmented raw amla and sliced raw amla and both ways it was a great pickle to have on hand. I still have a kilo of brined whole amla in my pantry and use those slightly darkened berries to make green chutney sometimes. But the sliced amla works really well for salads and sandwiches or served as it is on the side just like you serve pickled jalapenos, vinegared onions or pickled gherkins etc. Sliced amla makes the brine pickle more versatile in use as you can throw a few slices in any chicken, boiled egg, tuna or sausage salad along with other greens.

You can actually make brined pickles of any vegetables you wish. Cucumbers, cabbage, ginger and garlic behave really well along with grapes, radish, turnips, carrots, beets, knol khol etc. try with any of these vegetables and add slice jalapenos, bell peppers or any other sharp spices if you wish.


How to prepare the brine? 

Brine is just a solution of 30-35 gm of table salt and a Liter of filtered water. No heating required. Just mix both till the salt dissolves.


Now you can use any vegetables sliced in bite sized pieces and pour the brine over them. Just make sure you pour enough brine to cover the vegetable slices to make sure the fermentation in anaerobic and no contamination happens to the floating slices of vegetables.

The vegetable slices start getting sour by the next day, it means the fermentation has started. Watch out for the desired sourness and once you get your kind of sourness and softness of the vegetables, just refrigerate the brined pickle and use it for a month** or so.

** the longevity of the brined salad will depend on the vegetables used. Cucumbers get really soft and loose texture after souring for 3-4 days on room temperature but stays well if refrigerated after a day of souring. But will stay good only for a month or so. Amal will get perfectly soured and free of astringent taste within 3 days and will keep well on room temperature for a year or more. So it all depends on how well the vegetable slices behave with souring and softening the tissue. Amla slices remain firm and crisp all the while.

This is how amla looks when freshly brined along with a few slices of ginger..


Ginger gives a nice pink colour to the brined pickle. See how it looks after 4 days of fermentation. This colour stay for about 6 months and later it started darkening a bit but the taste and benefits remain the same.


Few points to keep in mind when brining the vegetables..

  1. Use sterilised glass jars or ceramic jars for brine pickling.
  2. Use as much vegetables as you wish but do not fill the jar to the brim. Keep some space for the brine.
  3. Wash and clean all vegetables being used really well. Clean the knives and chopping board properly before chopping the vegetables on them.
  4. Pour the brine solution just after chopping the vegetables. Do not keep the cut vegetables open for long. 
  5. Most vegetables keep submerged if you pour enough brine over them but some vegetables like cabbage or mature radish etc may float to the surface and keep exposed to the air, put a small sterilised bowl or plate above the brined pickle to keep all vegetables submerged. This is to provide anaerobic fermentation condition to the pickle.
  6. Open the lid once a day to check contamination and taste the pickle about sourness and desired softness of the vegetable being pickled.
  7. Refrigerate once the pickle is fermented enough for your liking.
  8. Note that brined Amla doesn't need any refrigeration.
  9. You can even brine raw mango slices, Amda (Hog plums), sour plums and even small sour apples this way. All these can be used to make salads, chutneys, pesto and as a souring agent for curries and stews as desired. 
  10. Add seasoning and spices as desired.


For the above cucumber brined pickle I just sliced cucumbers and jalapeno peppers (bhavnagri mirchi) and poured brine over it. There is a kick of chilly heat in this pickle that everyone likes.

The tall bottle in the background is store bought pickled capers. We don't get capers here but you can make your own pickled capers too following the same recipe and method discussed here or just like this blogger does.

Some people make brined amla with boiled amla but that is not the best way to bring out the flavours and that is not a probiotic pickle as well. I recommend this brined pickled amla for multiple health benefits.

See this apple and red cabbage pickled salad I make with home made vinegar of different types. The probiotic benefit from all these pickles is similar but the taste and longevity of the pickles will be different depending on the vegetables/fruits and pickling solution used.

This is the season for amla to be brined so go ahead buy some amla and slice them fine. I even added the remaining stone of the amla along with some remaining flesh after slicing to the brine and the pickle is being picked up on the dining table quite frequently.

Monday, July 28, 2014

probiotic foods: pickled salad with tart apples, summer carrots and red cabbage


Pickled salads are nothing but salads marinated with some spiced vinegar for a while. Any crisp fruits and vegetables can be pickled with a spiced vinegar and stored for a couple of days till the salad remains crisp or can be kept longer if the salad is intended to get softer. Cucumber or cabbage pickled salad would taste great even if the vegetables become softer after a prolonged pickling.

In this pickled salad I used small apples from the hills that were slightly tart. Small pears and hard sweet and tart peaches also taste great in this salad so please go ahead and pickle some salad and see if you like it. Always use naturally fermented vinegar for the probiotic benefit. I will keep updating this post with more pictures as I have already made a few versions of it, more pictures are there in my home computer and I am writing this post from Te Aroha where this salad has been included in the menu too, using tart apples from their own orchard.

ingredients

apples 1 kg (sliced or chopped into batons)
purple cabbage chopped in small shreds 200 gm
carrots chopped in batons or slices 200 gm
star anise 6
cloves 10
dry red chillies 3-4
black pepper corns 20
salt 2 tbsp
sugar 1 tbsp
water 1 L
natural vinegar, apple cider or sugarcane vinegar (I used coconut vinegar) 1 cup

preparation

Boil the water with the spices, sugar and salt for 5 minutes. Cool and add vinegar to it.

Sterilise a few jars and fill the copped apples, carrots and shredded red cabbage in them.

Pour the spiced vinegar in the jars and let the salad rest for at least 2 ours before serving.


The leftover liquid from the salad can be used to pickle baby onions once or can be had in shot glasses as a probiotic supplement.

You can cook the spices in just 100 ml of water and reduce the water further before cooling it down and adding vinegar to it. This will make just enough 'dressing' for the salad to soak in well and there wont be much leftover liquid once the pickled salad is consumed. This method works well if you want this salad made regularly at home.

Use this fermented/pickled salad along with chicken or boiled eggs or sausages or cheese etc to make salads or just serve this tart pickled salad on the side with burgers, sandwiches etc. A tbsp of this pickled apple and red cabbage will be really good in your daily smoothie as well.


Healthy Way powered by blogger.com
Design by Free7 Blogger Templates Simple Clean