Saturday, August 30, 2014

101 alternative flours: ragi or finger millet waffles with jaggery and ginger syrup

Cooking or baking with alternative flours is a bit tricky most of the times. The millet flours, the nut flours and the pseudo grains all behave differently when mixed with liquids or when cooked. One has to know them well before working on complex recipes but making simple flat breads, pancakes is easier. If you are one of those people who are scared of using millet flours, use them for rotis and other flat breads to start understanding these flours and then make pancakes to know how they would rise when combined with leavening agents. Most of them behave alright.

Ragi is also called Mandua in the hills as well as central plains of India. In Maharashtra it is called Nachni but the English name is Finger millet and most people would be able to find this flour in health food stores of those who stock organic flours.

I made waffles with ragi flour some time ago and have repeated it a few time already. Ragi flour does not make a good batter that can rise much, but addition of eggs or plain buttermilk solves the problem
and it cooks just like any other pancake or waffle. Gluten free waffles are so easy to do.


If you don't have a waffle iron I recommend you make a pancake and let the pancake get crisp on the surface. Ragi flour is dark in colour so you wont see the colour of the surface changing mush but you would get the idea as soon as the pancake or waffle starts leaving the cooking surface. Knock it using a knife and you would feel a thud that indicates the waffle or pancake is crisp on the surface.

ingredients
(for 3 waffles)

ragi (finger millet flour) flour 1 cup
3 eggs separated
whole milk 1/2 cup
grated jaggery or raw sugar 1/4 cup
dry ginger powder 1 tsp
butter 2 tbsp
baking powder 1/4 tsp
baking soda 1/4 ts

for the syrup

dry ginger powder 1 tsp
grated fresh ginger root 2 tsp (optional)
grated jaggery or raw sugar 1/4 cup
water 1/4 cup
pinch of nutmeg powder

procedure

Make the syrup first. Simmer everything mixed together till you get the syrup consistency that can be poured or drizzled easily over the waffle. It takes about 10 minutes on low flame.

Add nutmeg and mix, pour in a small milk pot with beak.

Mix the flour with the baking soda and baking powder, sieve the flour mix so it gets mixed nicely.

Now whip the egg yolks, milk, butter and grated jaggery together. Add the flour mix slowly using a sieve and keep whipping. Add a little more milk if required to get a thick batter.

Now whip the egg whites (placed in an absolutely dry bowl, using dry whipping blades) till soft peaks. Fold into the batter with gentle strokes and make the waffles immediately.

To make the waffles, pour 1/3rd of the batter over preheated and greased waffle iron and cover with the lid. Bake till the cover comes out clean and the surface is crisp. Repeat to make the other 2 waffles as well. Serve hot.

You can serve this waffle cut into quarters or whole, drizzled with the jaggery and ginger syrup. Some clotted or whipped cream on the side will be great if you don't have reservations.

Waffles can be served like desserts in small servings, with whipped cream and fruit preserves to garnish.

Let me know if you try this ragi waffles with jaggery and ginger syrup. Of course you can make pancakes too as I mentioned. Keep using more millets in your everyday food.

Note: if you want to make egg less ragi waffles, make the batter using buttermilk and whip the wet mix with a little flax meal (1 tbsp) slurry. The results will be good.


tasting British food at Kafe Fontana


I got to meet Chef Daniel Ayton at Kafe Fontana, the all day dining restaurant at Taj Palace here in New Delhi and taste British food. Getting to know the legacy of any kind of traditional food from someone who belongs to the land is the best way to explore the intricacies and I was kicked about tasting some authentic British food. This Chef's table was hosted in association with British High Commission and a variety of cheeses from Britain were introduced to us.

The special food festival A taste of Britain is going on till the end of this month. It is actually a well laid buffet alongside some Indian and Lebanese options alongside.


Chef Ayton talked about how British took influences from all over, having had colonies in all parts of the world and adapting the foods to British sensibility. We talked about English rice pudding and Kedegiri and how we have our own versions of meat stews and fish bakes after the British Raj. All our Indian hills have a rich tradition of baked English pies and stews thanks to British having their summer houses in the colder climes in the hills.

Chef Ayton has a long association with Taj London and had brought some special cheeses to be displayed here at Taj Palace, New Delhi. He patiently introduced every single cheese to us.

The British blue cheese called 'black sticks' is soft and creamy with high fat content, the taste is deeper with a pleasant after taste. Red Leicester is a mature cheddar which is very rich in flavours. Another blue cheese with lesser fat content and more dry which tasted a bit nutty. But the most interesting cheese was the Cornish Yarg, this cheese is matured wrapped in Nettle leaves and I was pleasantly surprised how nettle imparts it's flavours into this cheese. Quite nutty and a prominent whiff of nettle for sure.


I loved the Lebanese salads. Artichokes with sumac, beet root tzatziki, smooth hummus, a really fresh and flavourful tabbouleh were my favourites. A nice fattoush salad with feta, olives and lettuce with crisp fried pastry was really good too.


But the real find of the day was this fish soup called Cullen Skink (more of a Scottish soup). Made of Haddok the soup was made with saffron to add colour and flavours and the result was totally astounding. Small bits of potatoes and flavours of parsley and onion melded so well with saffron. The soup is not fishy at all.


A crumbed fish fry drizzled with melted cheese was also good. But such fish fried can never be wrong. It was a good accompaniment with the refreshing salads. The Billingsgate fish pie was a good find though, named after the Billingsgate fish market.


The fish pie was lovely, very subtle flavours and mashed potato on top. I liked it quite a lot. Creamy and nicely infused with herbs.

I can't say the same for Corn fed chicken in barbecue sauce. I wont care for corn fed chicken in the first place and the barbecue sauce was more Indianised I felt. Nothing to write home about.

A good looking Butcher's pie was a well made meat pie but I would prefer a flaky paratha with Indian style meat stew any day. It was not my thing. I don't care for soggy puff pastry over a hearty meat stew.

Among the vegetarian fare there was this gorgeous stuffed bell peppers with risotto. It was nice but I was expecting better flavours.


I liked the vegetable mille-feuille that was cooked with a rich cheese sauce.


The pesto flavoured vegetable crumble was not my kind of dish though I love vegetables in almost all forms.


Desserts are not my thing but I love to taste in small teaspoons, I like cooking and baking desserts for others after all. I enjoyed a few bites into the Sherry Trifle. Rich and flavourful, a bit over the top creamy but trifles would be like that.

This British Summer Pudding with currants and raspberries was really good. A bit tart from the berries, the pudding wont feel too sweet on the palate, just the way I like my desserts.


Among the many desserts I tried in small bites I loved the white chocolate bark with refreshing hints of mint. No I loved that white chocolate bark and intend to recreate it at home soon.

This chocolate bark stayed with me as I left Kafe Fontana feeling stuffed. This would be the only big meal of the day in any case and well enjoyed as I found a few gems here.

Even though there were a few misses in this buffet, I found a few gems to remember. Good experience overall I must add.


Tuesday, August 19, 2014

101 alternative flours | baking whole grain crackers : 5 recipes of whole grain crackers for everyday snacking

whole grain crackers

I have been talking about baking with alternative flours a lot on this blog. Last week we discussed how biscuits are the silent culprits of sneaking in more carbs and sugar and even trans fats into our system and how home baked cookies and bars with buckwheat could be one of the answers to packaged biscuits and cookies. How about adding more variety to the tea time snacks and appetizers and baking some savoury crackers?

I call these crackers as slow foods as these are very low on glycemic index and release the calories slowly into the blood. Not only that, you tend to eat these crackers slowly, enjoying every bite and hence consuming lesser amount of snack as compared to a packet of chips or potato wafers. Bake them from scratch, use your kitchen gadgets to make the process easy and enjoy snacking in a healthy way. Serve the crackers with fresh fruit salsa, quark cheese dip or guacamole or hummus to make it a mini meal.

Replacing white flour with millet flours like ragi (finger millet), barley and jowar (sorghum) or with flours of pseudo grains like amaranth and buckwheat is easy to work with when baking thin crackers. All these flours behave differently when made into a dough or mixed with water but one can play with them by adding a bit of chickpea flour or a little whole wheat flour if one is not bothered about gluten sensitivity. All this experimentation will be worth when you see how tea time snacking has become healthier and even party appetizers have become more fun and healthy as well.

Healthy baking is no rocket science. You just follow your choices and work around with flavours you like and add them to whole grain flours. Once you start using some herbs or greens for flavouring and some seeds for texture and crunch you would see how whole grain flours are suited very well for crackers. The texture of the crackers is more crunchy (not crisp) and more nutty owing to the whole grain flours. Adding poppy seeds and sesame seeds is my favourite way of adding value to the crackers and making them look beautiful too.

whole grain crackers

1. recipe of ragi crackers with poppy seeds 

ingredients 

ragi flour 1 cup
whole wheat or barley flour 1/2 cup
butter 2 tbsp
bathua or spinach puree 1 cup
salt 1 tsp
green chilly paste 1/2 tsp (optional)
poppy seeds 1/2 cup

procedure

Mix the flours with salt and rub the butter and green chilly paste (if using) thoroughly in the flour mix.
Knead the dough using the spinach or bathua puree. You may need less or more of the puree depending on how thick is the puree.
You can mix everything except poppy seeds in a food processor and knead the dough.
Now roll out small discs (like roti) using poppy seeds as dusting and cut the disc into thin wedges. Repeat with all the dough and make wedges to be baked into crackers.
Lay all these wedges on the baking sheet and bake at 170C for about 20 minutes or till they turn crisp. You may need to bake 3-4 batches of these crackers but the crackers bake fast so the whole process takes a little more than an hour.

Store in airtight container and serve with choice of dips or with Indian chai.

whole grain crackers and dips

2. recipe of whole wheat and barley crackers with fenugreek greens 

ingredients

whole wheat flour 1 cup
barley flour 3/4 cup
fenugreek leaves (cleaned and chopped) 3 cups
butter 3 tbsp
salt 1 tsp
pepper 1/2 tsp
anardana powder (dried pomegranate seeds powder) 2 tsp
milk 1/4 cup or as required

procedure 

Pulse everything in the food processor till a firm dough is formed. Trickle the milk slowly so the dough is stiff and firm, you might end up using more or less milk.
Roll out a sheet using the whole dough at once and cut out any shape you like for crackers. I like these crackers a little thicker but you can make them as thin as you wish.
Use the trimmings to roll out again and cut out more crackers.
Spread all these crackers on a baking sheet and bake at 170 C for about 25 minutes of the crackers are about half a cm thick. Watch out after 15 minutes of baking as all crackers burn really fast.

I like serving these with plum balsamic preserve and quark-garlic-parsley dip. You can have them as it is or with tamarind chutney.

whole grain crackers recipes

3. recipe of mixed grain khakhra style crackers with poppy seeds

ingredients

whole wheat flour 1/2 cup
barley flour 1/4 cup
chickpeas flour 1/4 cup
amaranth flour 1/4 cup
butter 3 tbsp
salt 1 tsp
ajwain seeds 1 tsp
poppy seeds 1/2 cup
milk 1 cup

procedure  

pulse everything except poppy seeds together in food processor and make a dough. Trickle the milk slowly to make a stiff dough.
Divide the dough in 10 portions and make balls with them.
Roll out flat thin discs using poppy seeds as dusting and roast them all on a medium hot griddle till light brown spots appear. Prick with a fork while roasting on the griddle to prevent them from puffing up.
Repeat to make 10 roti like khakhras that will not be fully crisp.
Cut the half cooked khakhras using scissors and bake them all at 170 C for about 10 minutes or till the khakhras get crisp.

khakhra crackers

I served these mixed grain crackers with a peach salsa that I made couple of weeks ago.

4. recipe of amaranth flour and sesame seeds khakhra crackers 

ingredients

amaranth flour 1/2 cup
barley flour 1/2 cup
chickpea flour 1/4 cup
sesame seeds 1/2 cup + 1/4 cup
salt 1 tsp or to taste
water or milk 1/2 cup

procedure

Make powder of 1/2 cup sesame and mix with the flours and salt. Make a stiff dough using the water or milk.
Roll out small discs after dividing the dough into a dozen small balls. Roll out thin using sesame as dusting so the sesame seeds stick to the surface.
Roast them all on medium hot griddle till faint spots appear. You can press these discs over the medium hot griddle using a rolled up tea towel till the khakhras get crisp or bake them just like the mixed grain khakhra crackers above.
I usually cut these in quarters if baking them and leave them as discs when roasting them over griddle.

khakhra crackers

These crackers taste great with any sweet and tart salsa too. I served them with kiwi salsa once and the crackers were in demand for some time. Now I serve them with basil pesto or with cucumber raita or even pineapple raita.

amaranth flour khakhra

5. garam masala crackers with mixed grains and sesame 

ingredients

whole wheat flour 1/2 cup
sorghum flour 1/2 cup
chickpea flour 1/2 cup
garam masala 2 tsp
kasoori methi 1 tbsp
salt 1 tsp or to taste
butter 2 tbsp
sesame seeds powder 1/4 cup
whole sesame seeds 1/4 cup
yogurt 1/2 cup or a bit more

procedure

Mix everything except whole sesame seeds together in food processor to make a stiff dough.
Gather the dough and roll out over a dusting of sesame seeds. Flip the rolling dough to coat it with sesame seeds on both sides. Keep the thickness a little less than half cm.
Cut out any shape you like and spread them all on a baking sheet.
Bake on 170 C for about 20-25 minutes or till the crackers are crisp.
Store in airtight container.

whole grain crackers

These were not one of my favourite crackers but my parents loved it quite a lot. My dad loved these with his tea or coffee and my mom wanted some tamarind chutney or mango chutney with this one. I tried these with tamarind chutney too and topped them with chopped onion etc to make them like papdi chaat. That is a better way to enjoy quick chaat when these garam masala crackers are around.

Later these crackers grew on me and I started having them with green chutney and even with karonde ka achar. This one is a green chutney made with tart apples, mint and coriander greens along with a green chilly and salt.

whole grain crackers

Some chutney on these crackers make it such an enjoyable treat. Now I break a couple of these crackers over my sprouts chaat as well.

These lentil cookies have already been a favourite and I bake them often with different seasonings. That reminds me, I have to bake a big batch of those for my dad who actually needs something to munch on 2-3 times a day.

How many of these whole grain crackers are you baking in your kitchen? I know each one of these will be a favourite and you would realise how easy it is to eat healthier and chuck those packets of wafers and biscuits.

Tuesday, August 12, 2014

baking with buckwheat : a buckwheat groats granola bar and a buckwheat flour and dates cookie | no added sugar


Healthy baking using alternative flours and natural sweeteners looks difficult for most bakers but many of them do it with ease. I think it is just about keeping your mind open and trying new flavours with real ingredients and not artificial flavouring agents and texture enhancers. I am here with another Wednesday post for Home Baker's Guild discussing buckwheat and amaranth as ingredients for baking a couple of healthy bars and cookies with no added sugar.


Baking a granola bar and a cookie with buckwheat this time as I have always noticed that most families consume a lot of biscuits every single day. Many people start the day with a biscuit or a rusk along with their tea or coffee and keep having a couple of different types of biscuits in between meals as snacks when they get bored or just to accompany a cup of tea. So much so that even kids are fed biscuits as meals when they refuse to eat regular food. This needs to change. One must bake some alternative dry snacks at home or try and get them made by local bakeries. Once the commercial establishments know what you are looking for, they would see a business opportunity in it and such snacks will be easily available.


Baking granola bar using fresh fruit pulp and buckwheat groats and some coarsely powdered almonds is really easy. One of those recipes where you just mix everything and spread on the baking sheet before pushing the tray into the oven. Adding some natural sugar is optional, I have added a spoonful of honey in this bar as we like mild sweet snacks and not too sugary. A little grated jaggery will be good to add if you want it more sweet.

It will be good to know a few properties of buckwheat if this grain (pseudo grain) is new for you. Cooking with buckwheat and it's flour can be tricky if you don't realise it can be a slimy goop when cooked, here are a few clever ways to cook and bake with buckwheat.

  • Buckwheat groats get a little slimy when soaked or cooked with water, roasting them before adding water helps if you want the groats cooked separately in pulao like recipes.
  • Whole buckwheat is more suited for roasting the grains first and then cooking it with water to get cooked plump buckwheat that can be seasoned or dressed like a pasta. One can soak the buckwheat and cook with some more water and a little butter to get a pulao, rice or pasta like texture.
  • Buckwheat flour gets really slimy when made into a batter with water, milk or buttermilk. It almost behaves like flaxmeal slurry but this property is useful in baking egg less cakes and breads. This buckwheat English muffin recipe works well even when you want a bread that bakes on a skillet.
  • Because of it's sliminess buckwheat flour has a good capacity to bind ingredients. This peoperty can be used to add loads of grated vegetables or fruits to make pancakes of sweet or savoury type.
  • Do not add liquids if you are baking cookies with buckwheat. The dough would result in hard cookies. Use lightly moist dates or figs that help binding along with butter and make the cookie dough.


Note that you can make your own buckwheat groats or buckwheat flour if you have whole buckwheat. Just run through a coffee grinder or spice grinder of a mixie for a second and you get groats. Grind it for about 2 minutes and you get a white fine powder. Buckwheat is a soft seed that powders quickly.

ingredients 
(makes about 20 bars)

buckwheat groats 200 gm (or run the whole buckwheat in blender for a second and use)
almonds 200 gm (coarsely powdered)
Fresh apricots seeds removed 180 gm
honey 1 tbsp or a little more
nutmeg powder a pinch

procedure 

Pulp the apricots well along with the honey. You might want to use a little more honey of the apricots are tart.

Mix with the buckwheat groats and almond meal using hands and knead lightly to make a sticky dough. Adding the apricot pulp slowly works better, add a little more of the pulp if required as it depends on how ripe and juicy the apricots are.

Spread this mixture on silpat sheet or any nonstick baking sheet and pat to make a thin layer of the mixture (a little less than one cm). Use a flat spatula to keep the margins straight. Then mark the sheet to cut bars.

Bake in preheated oven at 160 C for 25 minutes. Take out the baking tray and invert the silpat on a large chopping board. Cut the bars as marked. Spread them again on the baking sheet and bake again on 150 C for 30 minutes or till they get firm and crunchy.


I have been working on many recipes of granola bars and cookies baked using alternative flours. Some are here on this blog and some more to come but the thing is, we rarely snack on these cookies and granola bars. These kind of cookies, bars and some roasted nuts are useful only when we travel to places where we have to trek or hike and carrying light weight dry food is convenient. At home we love to snack on fruits and some freshly cooked snacks like roasted nuts, a bowl of poha, jhal mudi or a sprouts chaat.

This granola bar using amaranth flour is also baked sometimes for everyday snacking.


Being ginger and jaggery rich, this amaranth bar is more suited for winters. Even the cookies with buckwheat that I am sharing now will be more suited for winters with war spicing. It would be great if you add bits of candied ginger ti the dough.


This cookie with buckwheat flour would surprise you in the way it looks and the way it tastes. Mildly spiced and pleasantly sweet and nutty, this cookie has not used any nuts in it. Add a little more butter to this cookie when baking for kids as with lesser butter (as in this recipe) the cookies are better suited for adults. Butter makes these cookies really crisp. Sticking some chopped nuts or poppy seeds on these cookies will make it more attractive for the kids as well.

This cookie dough is a very good base for tarts as well. Try that sometime to make gluten free fruit tarts for kids.

ingredients
(for 20 small cookies(
I am giving cup measurements as the battery of my kitchen weighing scale died as I was making it.

buckwheat flour 1 cup
good quality soft dates (not sticky ones) 18
butter 1/4 cup
clove powder 1 pinch
nutmeg powder 1 pinch
ginger powder 1/4th tsp

procedure

Chop the dates and remove seeds.
Place all ingredients in a blender and mix well till it resembles bread crumbs or is the consistency of a tart dough. If you take a spoonful of mixture and apply pressure, it binds well.

Make small balls of this mixture, flatten all of them and arrange on a baking sheet.

Bake in a preheated oven at 160 C for 25 minutes.


This cookie is dense but a nice nutty crunch with a hint of spice gives it a unique flavour. You might like to add some chopped dehydrated fruits like cranberries or candied peel to this cookie dough to make it more enjoyable for the kids. This is an easy almost 2 step recipe suitable for busy adults who bake in the night to save time. Yes I baked this cookie in the night.

You would know how tasty buckwheat can be if you use it the right way. There are many buckwheat recipes on my blog you can try once you start getting buckwheat in your pastry. Buckwheat has been used in our homes for centuries, more for fasting foods during navratri and other festivals.

So buckwheat is completely sattvic in vedic terms, tags like gluten free and low glycemic, high protein etc started being relevant only recently. And did you notice how apricots and dates make wonderful natural sweeteners?

Monday, August 11, 2014

pear and rucola salad with walnuts and mango chutney dressing | a keeper recipe of mango chutney


Nothing like a fresh salad with locally grown fruits and garden fresh herbs. I brought really fresh naturally grown pears from Dhanachuli (located in Uttarakhand hills) and we have been eating pears for meals sometimes. This pear salad was one of those meals that we both enjoyed thoroughly. These pears are the ones that get soft after full ripening but the fruit seller had plucked them slightly raw to get a longer shelf life. Crisp and sweet these are. Yes those roadside fruit sellers in remote hills always pluck themselves and bring the fruit to the roadsides so the people traveling in vehicles can buy them. I love going to such fruit sellers in those areas and buying fresh fruit, it is a luxury we don't have in city life.


So I wanted to use the best of the pear in the best possible way. Of course we have been biting into a pear any time of the day but that could not prevent us from having a large bowlful of pear salad for dinner. How naturally grown real fruit (real whole food) captivates your senses in a different way than chemically enhanced food like substances. Amazing.

I had made mango chutney using the leftover mangoes that we brought from Ratoul last month. These were a mix of sweet and sour mangoes and we were fed up eating the same mangoes everyday. I turned them all into this chilly mango chutney and have been using it creatively since then. For this salad I just diluted the chutney with a little balsamic vinegar and a little water and it coated the pear salad well giving it a nice sweet sour hot kick.

The salad recipe is simple. Slice the pears the way you like, bite size pieces work well. Tear some rucola or arugula leaves ( I used them fresh from my garden) and mix with the pears. Add some tender beet leaves or red amaranth leaves to brighten up the salad and break a few walnuts over it. Drizzle the mango chilly chutney over the salad bowl and mix lightly with the folk as you eat.


Recipe of the mango chutney 

ingredients

fresh (or tinned) mango pulp 2 cups
sugar 1/2 cup
balsamic vinegar 2 tbsp
red chilly flakes (or powder) 1 tsp
scissor cut whole dry red chillies 2 ( I added just for a few larger pieces of chilly visible in the chutney)

procedure

Cook everything together till the chutney thickens to your desired consistency. Fill in sterilised jars and store in refrigerator for about a month.

* Try and use a mix of mango varieties in this chutney and include tart and sweet both types of varieties. This gives it more depth of flavours. Using reduced balsamic vinegar also gives it a deeper flavour so go ahead and make this mango chutney yours with a chilly kick.

This mango chutney works really well along with sharp cheeses over toasted crostini or crackers. Or with aloo paratha as Arvind loves it. I loved this mango chutney over grilled chicken too.

Just try replacing your junk ketchup with this mango chutney and see how well it tastes in sandwiches, with fries or even to make different cheese or mayo based dips.

I am planning a fruit pizza using this chutney as a sauce and pears and tart apples as topping with feta cheese and rucola. Who doesn't like easy yummy meals?

Please do let me know whenever you try this mango chutney.


Friday, August 8, 2014

3 ways to use fresh peaches : a peaches and cream dessert, a salad and a salsa with peaches


What do you do when you have the freshest peaches possible, you eat some you let them soften in the fruit basket and make some yummy desserts and salad with them. I even make pasta with peaches. I have been bringing loads of fruits from my frequent visits to Dhanachuli, seasonal fruits freshly plucked from the orchards of fruit sellers themselves most of the times. I have been making jams and preserves for the friends and family as well but those I rarely eat myself. Sugar free fruit desserts and salads are more my type of fruit consumption.

This 'peaches and cream' dessert is actually fresh soft ripe peaches and coconut cream blended together with a hint of Litchi honey. Thats it. Coconut cream can make any dessert great I feel. Especially if you like the subtle sweetness in it and the way it infuses with the chosen fruit. I love mangoes too with coconut cream. This coconut and cream dessert is almost frozen as frozen peaches and coconut cream is used in it. But the ice crystals get emulsified well when you blend it really hard resulting in a silken texture of this peaches and cream dessert.


ingredients
(4 servings)

fully ripe peaches 2 large (or 300 gm)
coconut cream 200 ml (use coconut milk if cream is not available)
honey 1-2 tbsp as required
coconut flakes or chips (lightly dry roasted if you like) 1 tbsp or as required

procedure

Halve the peaches and peel the thin skin as you would peel the skin of parboiled tomatoes. Fully ripe softened peach would allow you to do that. Chop and freeze in a container. Freeze the coconut cream in an ice tray to make it easy to blend. Freeze both of these for at least 2 hours.

Empty both the contents into a heavy duty blender and blend till completely smooth and silky.

Scoop out the semi frozen peaches and cream dessert into glasses or mugs. I used these beautiful glasses from Borosil, just perfect for such a delicate dessert.

Sprinkle coconut flakes over the dessert and serve right away.


You can plan this dessert a day ahead and blend right after the meal so it can be enjoyed at the right temperature. You can always use your ice cream maker and serve as desired.

You can also make Popsicle with the same peaches and cream dessert if you wish. I don;t mind it even if it is a little softer or creamier.


A salad with peaches is also a great way to use up the plenty you have brought home. Aren't you just like me who gets greedy for fruits and buys a lot?

I have been making peach salads and peach pasta every season and this version of insalata caprese is quite a favourite at our place. Sometime we just like it with salt, pepper and torn basil but sometimes I drizzle some basil pesto in the salad or just drizzle some garlic and rosemary infused olive oil.


I have used fresh paneer cubes and fully ripe peeled peaches in this saald. Just chop the peaches in bite sized cubes and toss with paneer cubes and torn basil in a preferred dressing. Sometimes I replace basil with mint and sprinkle some chaat masala to give it an Indian punch.


Being lightly sweetened peaches make a good addition to salads and can replace tomatoes in many recipes. A peach salsa and peach sauce is also really good if you like to spread it over grilled meat or chicken.

Peach salsa salad has the potential to become your family favourite too. Arvind took this salsa in his lunch box twice this week and loved it. Although I have been making tomato salsa, mango salsa and kiwi salsa as well and he has loved all of them. At least some of our choices are similar.


The recipe of the peach salsa salad is really quick. Just cube about a cup of ripe peeled peaches, add 1/2 cup of cubed ripe mango, one ripe plum cubed or a few pomegranate seeds and toss with chopped onion, minced green chillies (as much heat as you like) and some herb of your choice. I love coriander greens and mint leaves in this salsa salad so I use them generously. Add some chopped tomatoes and some chopped cucumber if you wish and season with Himalayan pink salt (or any salt you like) and pepper powder. I added a pinch of dry ginger powder to make the taste deeper and loved it.


 We enjoyed the salsa with some potato papad (alu ke papad from Banaras, microwave roasted) and few multigrain crackers crusted with poppy seeds.

This salsa can be made hot or mild as per taste, you can refrigerate for a couple of hours before serving as it helps melding the flavours better. This lovely jar of salsa will keep enticing everyone as soon as it is served on the dining table. Keep loads of crackers handy for it.


This post is written for the second round of #mybeautifulfood contest organised by Indiblogger and Borosil. For me the food should be healthy first but making it beautiful is not that tough if you get a little creative and prepare the food with love. Serving ware helps a lot you see.

You can find more peach recipes on this blog.
This peach salad with rucola and feta cheese has been phenomenally popular with friends and family.
Peach salad with red cabbage and onions, nuts etc is one more recipe that I keep repeating.
This peach salad with mint has been a perennial favourite too.
I even make iced tea with peaches and basil seeds.
This pasta with peaches is something you must try. Basically you can replace peaches with tomatoes pretty much all the time or replace half the quantity of tomatoes with peaches. Try and see how you like it. And let me know if you did.

Tuesday, August 5, 2014

baking breads using whole wheat flour and millet flours : gluten free or minimal gluten bread baking tips and tricks and a recipe of egg less banana bread

I have been getting requests for sharing my tips and tricks for baking whole wheat and millet flour breads and cakes. Somehow I couldn't do a detailed post on the small but significant tricks while baking with alternative flours but when KP Balakumar from Home Bakers Guild asked me to do a series about baking with alternative flours it was hard to resist. So I will be writing about baking healthy stuff for a few weeks, wait for the new post every Wednesday from now, looking forward to more queries and suggestions as we go.

All of us know baking is a science and one needs to follow recipes religiously to get good results but where is the fun without experimenting with new ingredients and innovating to get a more personalised product that suits our own taste and preferences. Including alternative flours for home baking is a good idea to get more nourishment but there are more reasons why we should include various other flours other than wheat flour.

All purpose flour is sacrilege for home baking.

It would be useful to know why so.

Traditional baking (contemporary) means only all purpose flour, butter and sugar but baking in pre industrial era was not all about white refined flour and purified industrial yeast. Whole wheat flour and sourdough starters were used to make breads and unbleached flour with or without bran was used for baking cakes. As the industrial invasion of refined flour started, the industrial corn byproducts like high fructose corn syrup (HFCS), corn starch and soybean isolates also started trickling in the industrially baked goods to provide softness, moistness, improved texture, enhanced taste and longer shelf life. In the mean time wheat was also being bred for more yield, more disease resistance and more gluten content to make the breads softer and softer. Eventually as the home baker also started depending on 'golden syrup', 'dough conditioners' and 'added gluten' along with refined wheat flour with added corn starch the industrial revolution invaded into the good old home baked products as well. Imagine you home baked cake containing innocent looking additives originating from genetically modified corn and soybeans. Incidentally, India is still not growing any genetically modified crops but 'refined corn and soy based additives' and a whole range of cake mixes are being imported and are selling like hot cakes. I am not including the chemical conditioners, preservatives and colouring agents into this discussion but just imagine how many unnatural genetically modified plant based products we are incorporating in our foods and what a chemical cocktail we serve at our tables. Please think aloud.

I would like to add a word about gluten intolerance which is being brushed off as a modern diet fad, please know that we are consuming about 10 times more gluten than our previous generations as the new wheat varieties have more gluten in them and we are eating more and more wheat products both as home cooked meals and when eating out. All the other grains (coarse grains and millets) that were quite common some 50 years ago have been phased out because wheat is cheaper, wheat products are easier to produce industrially and have a longer shelf life. Coarse grains and millets get rancid faster and the overall texture of the baked product is not attractive to look at. The biggest factor in millet products not being fashionable is that industrial baking with millets is a little difficult for the manufacturer and I am telling this after some experience of training industrial bakers.

There are many factors, mostly industrial, after wheat being the primary staple grain for the whole population but there is a larger concern of environment conservation as well and monoculture of wheat as a grain should be stopped, more millets should come into the food chain of modern population. Gluten sensitivity may be an individual issue, wheat monoculture is a larger concern. Imagine industrial forces guiding our food choices as we end up eating a whole lot of things our bodies are not designed for.

Eating more varieties of grains ensures we do not eat loads of gluten and also provides more nourishment to the system. Gluten free for some or minimal gluten for all is not just a fad, it is the requirement in modern times.

I hope everyone will be motivated towards baking breads, cakes, cookies and crackers etc using alternative flours after knowing why it is important. Baking ragi bread is as easy as baking a whole wheat bread and an English muffin with buckwheat flour is even easier. You can bake cookies using almond flour, oatmeal or even lentil flours with your choice of flavorings. You just have to put your mind to it.

Before I share a few tips and tricks about baking with alternative flours, I must add that grains should not make the whole meal whether it is wheat, rice, barley, oats or any other millet. Always include loads of vegetables, some protein and good fats to your meals to make it balanced. Forget about the percentage daily allowances and enjoy real food everyday, the meals will be healthier automatically.

Tip #1 Whole wheat breads are easy to bake but most people end up adding some APF (all purpose flour/maida) or some gluten to make the bread spongier and softer. There is small trick to make the existing gluten in whole wheat stronger so the bread rises well and taller. Just make a thick batter like biga with 1/4th of the total flour first and whisk it using a balloon whisk. The biga whisks easily first but within 5 minutes the biga batter starts looking stringy and resists whisking. This indicates a stronger gluten and happens due to the sticky gluten releasing from the flour particles and binding with each other.

After this whisking the biga is proceeded with the remaining flour to make a dough for rising. This biga trick works like charm while making 100% whole wheat breads.


This 100% whole wheat bread without added gluten can be baked in loaf tins to get sandwich slices too. But we rarely eat sandwiches and I love baking free form loaves so it is always like this.

It doesn't mean I don't make some grilled sandwiches using my free form loaf slices too. This paneer sandwich is just so easy to hold with irregular shaped slices.

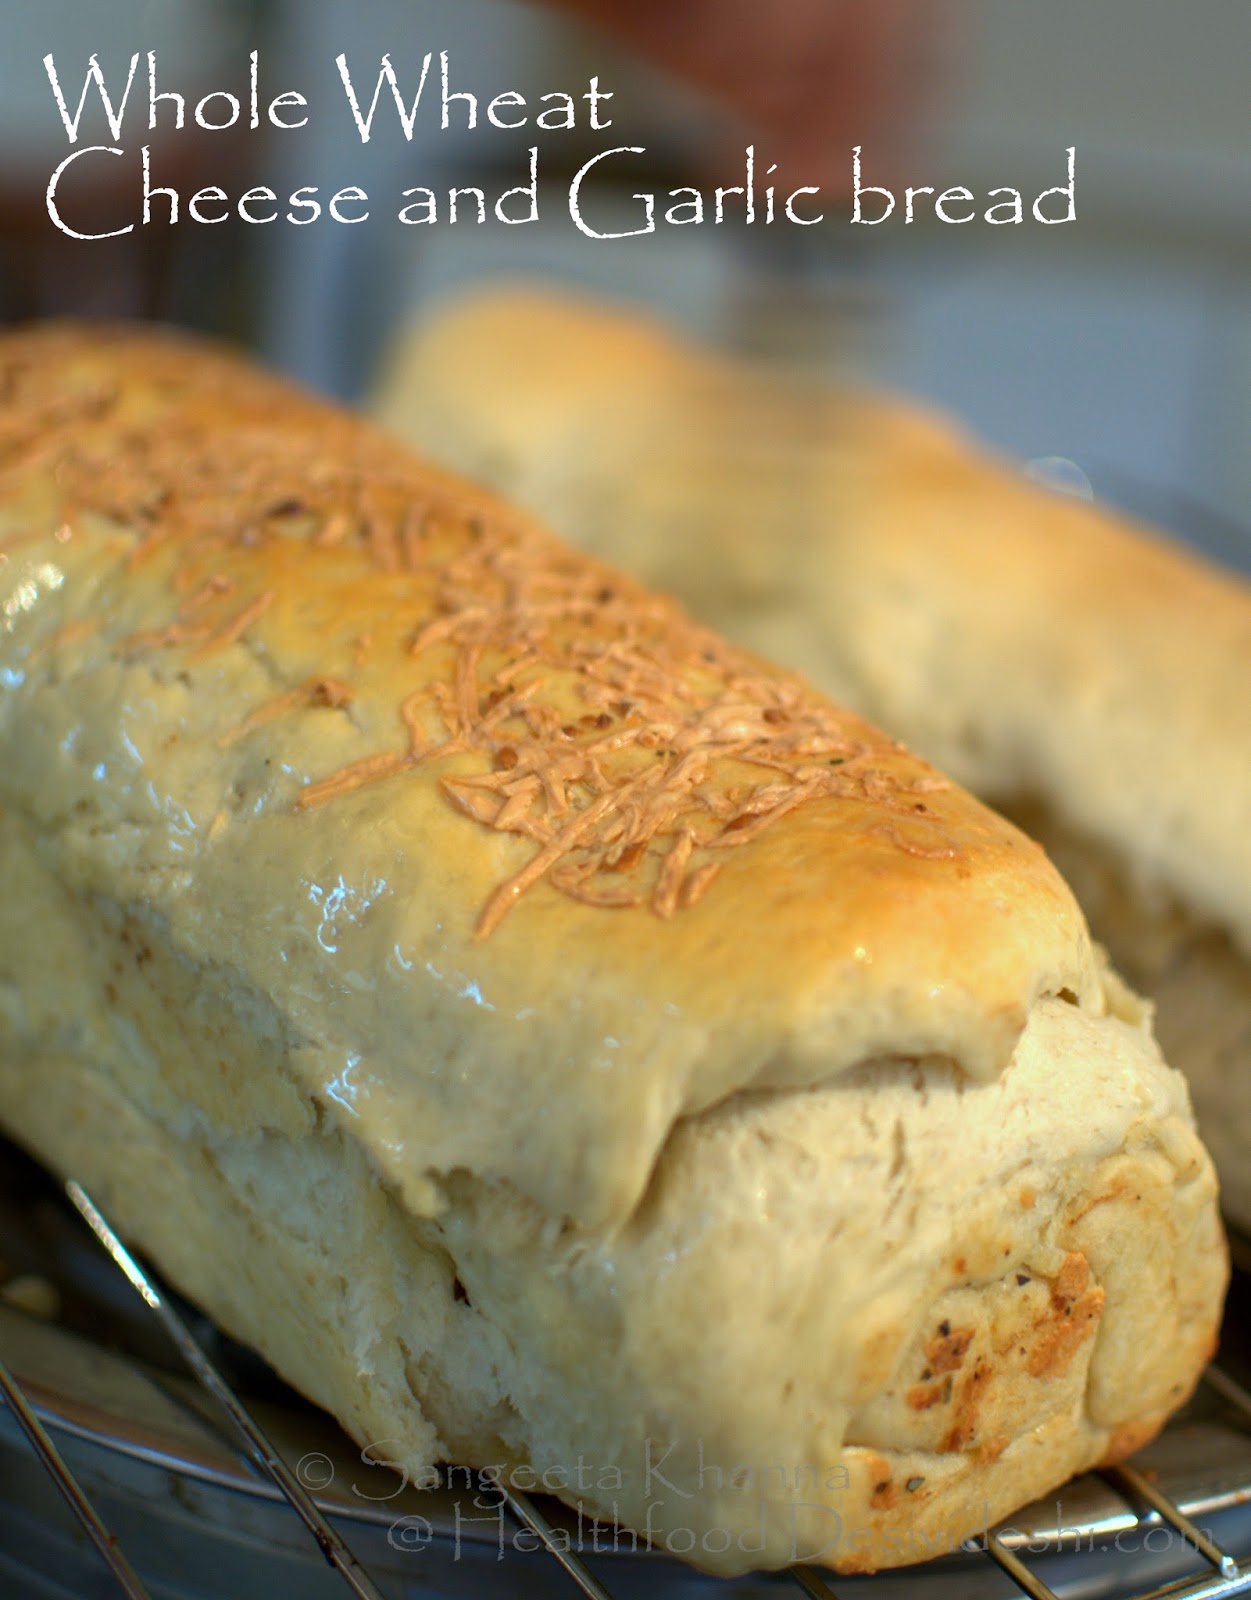
The same dough can be rolled with garlic butter and some grated cheese to make a whole wheat oats cheese bread as well.


Sourdough whole wheat bread with a few more flavours is also easy to bake. Read how to take care of sourdough starter and make a yummy bread with it. I used to bake whole wheat breads even in microwave oven till few years back and then I started baking my breads in an OTG.

Next one is a sourdough ragi bread and has more complex flavour.


Tip #2 Make free form loaves when the bread dough contains more than 50% millet flour and about 25% of whole wheat flour. We are talking about no APF no added gluten breads and in this ragi bread I use some potato for better binding. These kind of breads are better for bruschetta, crostini or as garlic bread sticks. Toast them and have with your soup.


Ragi dough is easier to handle if you make smaller buns to make burgers etc. Check out this ragi buns recipe and how healthy the burger becomes. I find the taste more complex and 'better'. White breads are just so plain.

Tip#3 Sourdough breads are healthier as many strains of yeast are involved in fermenting the dough that gets richer in diverse types of minerals and vitamins. Purified industrial yeast is good too but has limited health benefits although it does make the bread baking easier for everyone. No harm using fresh or instant varieties of yeast for bread baking.

Tip#4 Whole wheat breads can be made with added oats as well and the best way to make these whole wheat and oats breads softer and moist is to use cooked oatmeal to make the dough. Read more details of the procedure here in this whole wheat and oats bread with rucola and olives.


Tip#5 If you are not confident with a loaf while baking with whole wheat or mixed flours try and bake some pita bread or kulcha first. Flat breads are easier to handle and rise well. You can always mix flours like amaranth or barley (about 25%) in the whole wheat pita bread dough. Here is a pita bread with whole wheat and amaranth flours. Roll out softly, let them rise a bit on the baking sheet before putting the tray into the oven and bake till they fluff up. Brush with melted butter so the pita breads don;t turn hard. Whole wheat pita breads can become hard if left uncovered or un-buttered for some time.


Tip#6 Place a bowl filled with hot boiling water in the oven so that steam circulates in the oven cavity while the whole grain breads are baking. This allows a better crust that seals the moisture within the loaf. Always brush the baked loaf with melted butter to soften the crust and seal in the moisture some more.

Tip#7 Store all whole wheat and mixed flour breads wrapped in cling film after cooling them completely. Most whole grain breads last a week or so. Refrigerate till required and slice them before reheating or toasting the bread slices. A little extra care into handling the baked whole grain breads goes a long way. Remember that these breads are a little denser and you need lesser number of slices that white bread. Whole grain breads are more filling and satiating too. Richer complex taste of course.

Tip#8 They say microwaving to reheat breads is sacrilege. But this rule is for the 'white' bread that looses moisture and becomes elastic when heated in microwave. Toasting works better for white breads but for whole wheat and mixed flour breads microwave reheating works like a charm. These breads are richer in texture and flavours and nothing is lost when we reheat in microwave briefly. Toasting the bread works too if you like.

You can even bake some pizza with whole wheat and mixed grain dough. See this Arab pizza called Lahm Bi-A'jin or Sfiha that can be baked using any flour you like. A rich topping of minced meat and greens makes it a really healthy and filling meal.


It doesn't mean you have to always bake a pizza. You can even bake pizza base on a griddle as well. See this buckwheat pizza I make so often.

Tip#9 You can bake completely gluten free breads too if you are gluten intolerant. This buckwheat English muffin tastes yummy and can be baked on a griddle. You can always bake a focaccia with buckwheat flour using the same batter.

Tip#10 Many people have asked me for recipe of a bread that can be baked without an oven. This sounds ridiculous but is very much possible. See this skillet bread recipe with whole wheat and sorghum flour. This bread can be sliced and used to make yummy crostini.


Tip#11 If you are a beginner baker and afraid of the yeast monster there is nothing to loose. You can always bake some fruit based quick breads to start with. Banana bread is the simplest and often helps you use up the leftover overripe bananas. You would gradually move on to bake soda breads and then yeast breads with whole grain flours if you are determined.


I have posted a version of banana bread with eggs in the past. I developed an egg less whole wheat and barley flour banana bread recipe for beginners so there is no hassle of measuring things too much. Believe me this bread turns out well even if have been adding things by just eyeballing them.

Recipe of egg less banana bread with whole wheat and barley flours..

ingredients
3 over ripe bananas
3/4 cup thick yogurt
2 tbsp honey
2.5 tbsp melted butter
2 tbsp flax meal
1 tsp salt
2 tsp baking soda
1/2 tsp baking powder
3 tbsp chopped walnuts
4 tbsp golden raisins
4-5 tbsp dark chocolate chips
2 tbsp sunflower seeds
1.5 cup whole wheat flour
1/2 cup barley flour
1/4 cup amaranth flour (or replace with more barley flour)

procedure

Preheat the oven at 180C.
Mix the flours with baking soda and baking powders. Add salt and sieve the flours to mix everything well. Add chopped walnuts, chocolate chips and raisin to the flour mix and keep aside.
Whip a smoothie with bananas, yogurt, honey, melted butter and flax meal.
Now pour the smoothie into the flour slowly and mix lightly using your hands till the mixture forms a thick batter or a very loose dough.
Slide this into a greased loaf pan and sprinkle all the sunflower seeds evenly over the loaf. Press the seeds with your fingers so they get embedded well.
Bake for about 45 minutes or till a skewer comes out clean.
Invert the loaf pan onto a wooden board and let the bread cool down before slicing.


This nutty banana bread is a light textured breakfast bread and tastes really good with either fruit juice or milk. Isn't it an easy recipe? You just make a smoothie, mix the flours and nuts and mix them both to make a loose dough and bake a bread.

Do let me know if this detailed post was helpful in understanding whole wheat and mixed flour (multi grain) breads. Never add gluten or dough conditioners to your home baked breads. You deserve better quality when you are putting your own elbow grease to it.

Remember that bread baking is therapeutic whatever flours you use. Baking with whole wheat and millet flours makes it healthier for the family.

And the last but the most important tip that I would share or rather urge you to follow is, please don't compare your home baked breads to the white sliced breads available in commercial bakeries. You deserve better than that industrial product and that is why you are thinking about home baking. Enjoy the wholesomeness, the artisan quality and the wholesome nutrition that home baked bread brings to your table..

 
Healthy Way powered by blogger.com
Design by Free7 Blogger Templates Simple Clean