Thursday, November 27, 2014

eggplant raita or baingan ka raita : two recipes to make the everyday meals interesting


Eggplants are versatile vegetables found in various shapes and hues. I have grown almost all possible colours and shapes of eggplants in my gardens over the years and have found slight variations in taste and aroma etc, and the way they cook to become too soft or a little firm. Some of them have a little bitterness after cooking and some have a subtle sweetness that they impart to the baingan bharta or baba ghanoush we make with them.

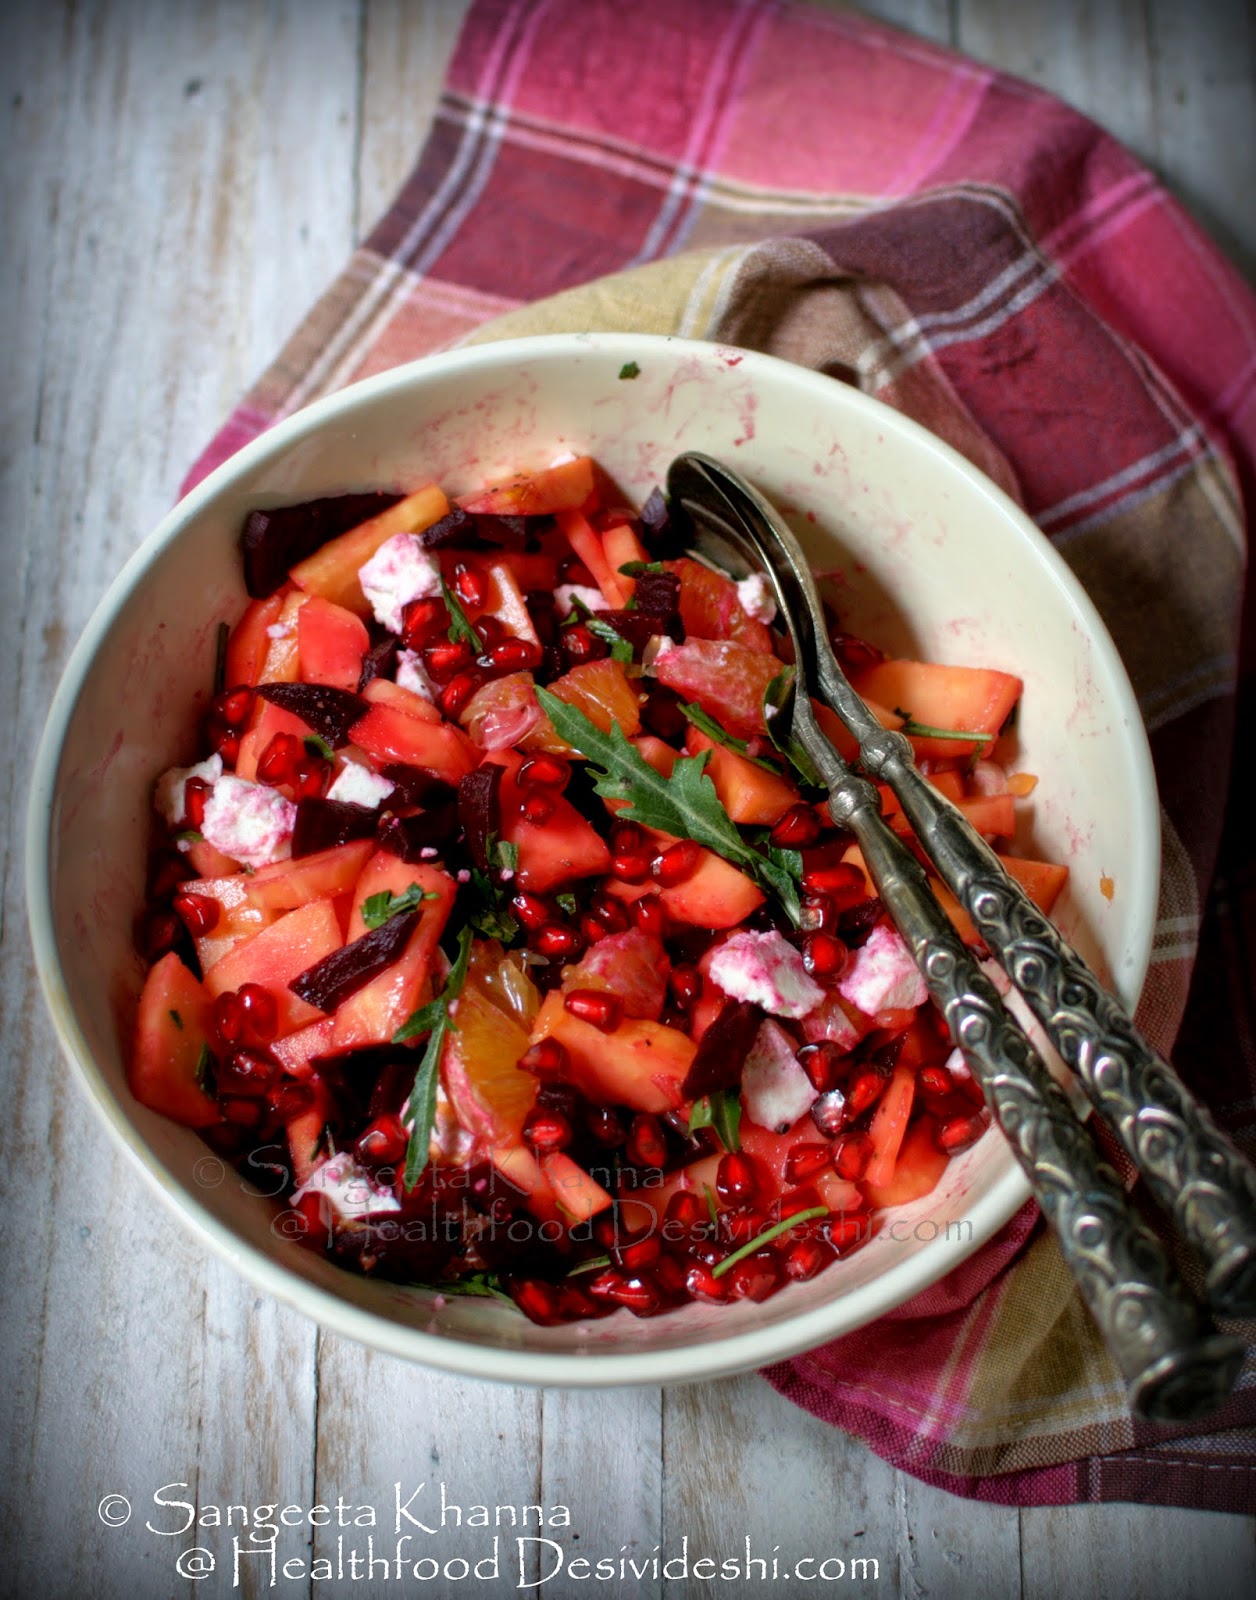
I am now realizing that I haven't yet shared our traditional recipe of baingan ka chokha (eggplant mash), not even the baingan ka bharta, both being similar in looks but very different in flavours. I will correct this mistake really soon and share both the recipes. This eggplant raita or baingan ka raita recipe was long overdue since Amrita asked for it once I shared a picture of this raita with a beetroot salad recipe. Now that this raita is quite frequent on my plate owing to the ease to cook it and the way I can make variations too, I took a few more pictures and now the recipe is here. I am sharing two variations of eggplant raita. One with the green eggplants from my garden and another with the round purple variety that is also called bharta wala baingan here in north India.


These green oblong beauties are fresh from my garden and I sometimes just grill them on gas flame for a couple of minutes as they cook really fast. I never bother to peel these ones after grilling as the skin is very thin and doesn't change the taste of whatever I cook with them. I make a smooth blended raita with these which is mostly had like a thick cold soup.

Here I served it with a raw papaya paratha (with besan and atta mix) and polished off a huge bowl of this raita with just one paratha. This recipe is useful when you want to consume loads of vegetables and some calcium supplementation in your food too. I have added sesame seeds to this raita along with hung yogurt to fortify it with calcium.


Recipe of eggplant and sesame seeds raita

ingredients
(2 servings)

grilled eggplant peeled (if required) and mashed 1 cup
hung yogurt 1 cup (preferably full fat)
sesame seeds 2 tbsp
garlic cloves 5
paprika powder or mild chilly powder 1 tsp
salt to taste

procedure

Powder the sesame seeds first in food processor of blender. Add hung yogurt, mashed eggplants and other ingredients together and blend till smooth. Serve as desired.

You can use fresh yogurt if you like this raita a little liquid but note that the grilled eggplant mash is quite watery too.

The round purple variety of eggplants is more fleshy and more aromatic I feel. I have not grown this variety for years now but I keep buying it whenever I see some fresh light weight eggplants of this variety. Always choose shiny, light weight eggplants with a fresh green crown on them.


These need to be flame grilled too to made into a raita. This raita is more like a mashed chunky mix of flavours that feels almost like a subzi (curry). You can make it more like a white raita by adding more yogurt or buttermilk to the recipe but it would depend what you are serving it with. Tweak the recipe as it suits you.


Recipe of chunky baingan ka raita

ingredients
(2 servings)

2 medium sized round eggplants flame grilled and peeled or 1.5 cup cleaned and mashed grilled eggplants
minced green chillies 1 tsp
minced garlic 1/4 tsp
finely diced red onions 2 tbsp or a little more
chopped coriander greens 3- tbsp
salt to taste
hung yogurt or thick yogurt 1 cup or more to suit your taste

procedure

Mash everything together to make a thick mix. Serve as required. Here I had it with a multigrain roti (flat bread) and amle ka achar along with loads of cucumber and radish batons on the side.


The kind of simple meals I like. Such meals are very good for days when you want a light yet tasty meal to satiate you.

I have shared some oriental style eggplant recipes here, please check out if you love eggplants like me and want to eat eggplants differently.

Friday, November 14, 2014

fermented foods | amla or Indian gooseberry in brine | the best way to make brine fermented pickles


I have been using the Indian Gooseberry aka Amla or Aonla as it is called in Hindi, a lot these days. Amla starts appearing in the markets in the autumn season and keeps coming till the winter lasts. As if to provide immunity towards winter ailments in the country where winter can be really harsh and there are no central heating in homes. Winters are short but come with a few ailments thanks to lowered immunity during this time. Amla helps boost immunity but there are many people who don't like the taste of amla and completely ignore this seasonal bounty of nature.

While we love the boiled amla chutney and instant amla pickle (amle ka achar) along with random green chutneys made with coriander and mint greens and a few amla berries thrown in, there are people who detest the slightly astringent taste of amla. This amla coconut chutney is one where nobody has detected presence of amla as yet, the chutney is served with idli and dosa.

Some readers on my facebook page (Healthy Living With Sangeeta Khanna) asked me how to make brined amla so everyone in the family can eat it regularly and I was reminded of the brined amla I had tasted at a Maharashtrian friend of mine. Those were small amlas, brined whole in heavily salted brine that they serve to start with the meal as a palate cleanser and digestive.

Later I tried with segmented raw amla and sliced raw amla and both ways it was a great pickle to have on hand. I still have a kilo of brined whole amla in my pantry and use those slightly darkened berries to make green chutney sometimes. But the sliced amla works really well for salads and sandwiches or served as it is on the side just like you serve pickled jalapenos, vinegared onions or pickled gherkins etc. Sliced amla makes the brine pickle more versatile in use as you can throw a few slices in any chicken, boiled egg, tuna or sausage salad along with other greens.

You can actually make brined pickles of any vegetables you wish. Cucumbers, cabbage, ginger and garlic behave really well along with grapes, radish, turnips, carrots, beets, knol khol etc. try with any of these vegetables and add slice jalapenos, bell peppers or any other sharp spices if you wish.


How to prepare the brine? 

Brine is just a solution of 30-35 gm of table salt and a Liter of filtered water. No heating required. Just mix both till the salt dissolves.


Now you can use any vegetables sliced in bite sized pieces and pour the brine over them. Just make sure you pour enough brine to cover the vegetable slices to make sure the fermentation in anaerobic and no contamination happens to the floating slices of vegetables.

The vegetable slices start getting sour by the next day, it means the fermentation has started. Watch out for the desired sourness and once you get your kind of sourness and softness of the vegetables, just refrigerate the brined pickle and use it for a month** or so.

** the longevity of the brined salad will depend on the vegetables used. Cucumbers get really soft and loose texture after souring for 3-4 days on room temperature but stays well if refrigerated after a day of souring. But will stay good only for a month or so. Amal will get perfectly soured and free of astringent taste within 3 days and will keep well on room temperature for a year or more. So it all depends on how well the vegetable slices behave with souring and softening the tissue. Amla slices remain firm and crisp all the while.

This is how amla looks when freshly brined along with a few slices of ginger..


Ginger gives a nice pink colour to the brined pickle. See how it looks after 4 days of fermentation. This colour stay for about 6 months and later it started darkening a bit but the taste and benefits remain the same.


Few points to keep in mind when brining the vegetables..

  1. Use sterilised glass jars or ceramic jars for brine pickling.
  2. Use as much vegetables as you wish but do not fill the jar to the brim. Keep some space for the brine.
  3. Wash and clean all vegetables being used really well. Clean the knives and chopping board properly before chopping the vegetables on them.
  4. Pour the brine solution just after chopping the vegetables. Do not keep the cut vegetables open for long. 
  5. Most vegetables keep submerged if you pour enough brine over them but some vegetables like cabbage or mature radish etc may float to the surface and keep exposed to the air, put a small sterilised bowl or plate above the brined pickle to keep all vegetables submerged. This is to provide anaerobic fermentation condition to the pickle.
  6. Open the lid once a day to check contamination and taste the pickle about sourness and desired softness of the vegetable being pickled.
  7. Refrigerate once the pickle is fermented enough for your liking.
  8. Note that brined Amla doesn't need any refrigeration.
  9. You can even brine raw mango slices, Amda (Hog plums), sour plums and even small sour apples this way. All these can be used to make salads, chutneys, pesto and as a souring agent for curries and stews as desired. 
  10. Add seasoning and spices as desired.


For the above cucumber brined pickle I just sliced cucumbers and jalapeno peppers (bhavnagri mirchi) and poured brine over it. There is a kick of chilly heat in this pickle that everyone likes.

The tall bottle in the background is store bought pickled capers. We don't get capers here but you can make your own pickled capers too following the same recipe and method discussed here or just like this blogger does.

Some people make brined amla with boiled amla but that is not the best way to bring out the flavours and that is not a probiotic pickle as well. I recommend this brined pickled amla for multiple health benefits.

See this apple and red cabbage pickled salad I make with home made vinegar of different types. The probiotic benefit from all these pickles is similar but the taste and longevity of the pickles will be different depending on the vegetables/fruits and pickling solution used.

This is the season for amla to be brined so go ahead buy some amla and slice them fine. I even added the remaining stone of the amla along with some remaining flesh after slicing to the brine and the pickle is being picked up on the dining table quite frequently.

seafood promotion at the rooftop restaurant - Le Bevedere at Le Meridien and a recipe of king scallop in chilly bean sauce


Seafood is something we crave for, something we always look forward to as we don't normally get good quality fresh seafood around here in Delhi. We do get our quota of seafood when we visit INA market and stock the fridge but that doesn't happen very frequently because of the hassle of cleaning the seafood at home. It is much more easier to order chicken or meat and start cooking immediately without any hassle of cleaning. Yes, sometimes I compromise on cooking some of my favourite foods because of cooking and cleaning hassles and prefer eating out whenever we get a chance. And we have always loved the seafood served at Le Belvedere (at Le Meridien, New Delhi) with a nice view of Lutyen's Delhi.


 It was a coincidence that Purba asked on Twitter whether we can meet any time soon and I suggested why don't we meet at Le Belvedere. It was the occasion of a preview of the soon to be held seafood promotion at the restaurant and we lapped up the opportunity. Love for seafood and joy of meeting friends after a while both being nurtured together. It was a fun lunch with sips of wine and laughter.

I started with a clear chicken soup that is one of my favourites even at home. Simple flavours with fresh crisp vegetables and generous chunks of chicken breast that comfort the soul. I started my soup late and the main course had arived by that time and the soup was so good I kept having in between my main course bites.

Pomfret in hot bean sauce was very delicately flavoured, soft and fresh but many of us found the bones a little distracting. I have always loved their lobster and this time too it was the same old good taste with fresh ingredients and flavourful sauce to accompany. Perfectly cooked and lightly seasoned I must add.


The whole red snapper looked sad in the face but packed a punch taste wise. We tasted the king fish in black pepper sauce and that was good too. But the unanimously favourite dish was the king scallop in chilly bean sauce. Chef Balkishan Chauhan was generous enough to part with the recipe for all of you. Perfect texture that results from great timing while cooking and fresh crunchy vegetables to pair it with. Loved the black mushrooms as a base and crisp snow peas.


Here is the recipe for you all. All this seafood was polished off with stir fry noodles, plain boiled rice and sticky rice. My choice is sticky rice for sure.

Pan roasted king scallop in chilly bean sauce

(4 servings) 

Quantity                          ingredients

 400 gm                         King Scallop
    2 tbsp                         Corn flour
    1 no.                           Egg
    To Taste                     Salt
    ½ tsp                          White Pepper Powder
    30 ml                         Cooking Oil
    2 tsp                          Chopped Garlic 
    2 tsp                          Chopped Ginger
    2 tsp                          Chopped Black Bean
    1 tbsp                        Red Bell Pepper
    1 tbsp                        Yellow Bell Pepper
    2 tbsp                        Green Bell Pepper
    2 tbsp                        Onion
    2 tbsp                        Spring Onions
    1 tsp                          Chilly Paste
    1 tbsp                        Soy Sauce Dark                        
    2 cup                         Fish stock
    2 tsp                          Chinese cooking wine
    2 tsp                          Sesame oil


METHOD

1.   Take king scallops and wash them properly. Keep aside in cool place.
2.   Wash and cut bell peppers, onion and spring onion into dices.
3.   Marinate scallops in a mixing bowl with salt, white pepper, egg, and corn flour.
4.   Keep marinated scallops in refrigerator for ½ hr.
5.   In a wok heat the oil, add marinated scallops and cook it until golden brown in colour or tender. Keep aside.
6.   Heat oil in a wok, add chopped ginger, garlic, black bean and sauté it. Add bell pepper, onion, and spring onion toss it well.
7.   Add chilly paste, soy sauce dark, fish stock, salt, and sugar in to the mixture and bring it to boil.
8.   Add roasted scallop with mixture and heat it well check the seasoning and adjust the consistency With slurry (Corn starch and water)
9.   Add Chinese cooking wine and sesame oil and mix it.
10.       Remove from heat. Serve hot.

11.       It can be served with sticky rice or noodle.  


Try the recipe at home and recreate the magic that Chef Balkishan creates with king scallops.

Desserts were not needed but Anasuya and Chef Balkishan insisted and we tried the date pancakes and toffee banana. I took a bite of date pancake it was well made, rich flavours. Toffee banana was praised by those who tried it.


Here are the crazy bunch of people who spent a lovely time together that afternoon. 
Sipping illy coffee after the lunch and catching up on gossip.


The seafood promotion starts from 14th of this month. You might like to go and experience the view from 20th floor and the yummy seafood too.

Monday, November 10, 2014

101 gluten free breakfasts : stir fried fresh water chestnuts (water caltrops) with coconut and curry leaves


Breakfast is the most important meal of the day and can make or break the day for some people. I am one of those who keeps switching between a light breakfast, full lunch and light dinner routine to a heavy brunch and early dinner kind of routine. For me it depends on my work routine, my sleep cycle that keeps changing like seasons and of course my mood. I love savoury breakfasts for myself and the husband likes his pancakes and porridge, fruits and muesli all sweetened lightly with honey or unrefined sugar. I am sure you already know our breakfast habits well if you have been reading this blog for some time. There are a few breakfasts we both like and I usually reserve them for weekends when we eat together in leisure.

I meet many people who wonder how to not eat bread everyday for breakfast and still keep the breakfast filling and tasty. Including vegetables for breakfast is also a huge problem with those with a habit of toast and egg scramble type of breakfast. I have posted loads of healthy breakfast recipes in the past but more are required I felt. A series of gluten free and vegetables based breakfasts would be good to have and hence this new series of 101 gluten free breakfasts. Hope you would find it useful if you have been trying to avoid gluten for whatever reason.

The first recipe is the wealth of this season, the fresh water chestnuts (water caltrops, singhada or paniphal) that we get for 2-3 months just before the winter starts. This is one vegetables (technically a nut) we both like and even Arvind wouldn't mind a savoury breakfast if it is made using fresh water chestnuts.


He loves singhada so much he would peel while watching TV and keep them ready if required. But I get them peeled by the house help mostly and it is a great convenience if one has to make a quick snack or salad or a breakfast like this. Here is how the peeled fresh water chestnuts (caltrops) look.


I keep making salads with fresh water chestnuts (singhada) and even some curries and soups as well, but having them peeled in the fridge makes one greedy and have more of this seasonal bounty of nature, that is singhada.

I made this stir fry with a south Indian tadka for breakfast on a weekend and we had it with masala chai with fresh cream. We never shy away from fresh cream and ghee as these are healthy fats but I have noticed we feel better if we keep our gluten intake minimal. Please note that gluten is not bad for all but can be really nasty for some people and can be mildly problematic for others. Read my post on how gluten is not a monster but needs to be taken with caution.


ingredients
(2 servings)

chopped fresh water chestnuts (singhada) 2 cups
urad daal (skinned, split black beans) 1 tsp
chana daal (skinned, split chickpeas) 1 tsp
black mustard seeds 1 tsp
dry whole red chillies 2 broken
curry leaves 3 springs
fresh grated coconut 2 tbsp
salt to taste
black pepper powder to taste
ghee 1 tsp

preparation 

Heat the ghee and tip in the mustard and the lentils. Let them sizzle and get aromatic, taking care not to burn them. Now add the broken red chillies and curry leaves in that order and stir them so they release flavours in the ghee.

Add the chopped water chestnuts, salt and stir to mix. Cover for 2 minutes on low flame and stir once again. It may need further cooking for 2-3 minutes but keep stirring to make sure it doesn't get burnt at the base. Add the grated fresh coconut and black pepper powder and mix well to coat everything.

If the water chestnuts a little mature they would need about 6-7 minutes of total cooking for this quantity. But they are great even if half cooked as they can be eaten even raw.

Serve hot for breakfast or for a tea time snack. You might like to add a few drops of lime juice but we like it as it is. It can be a great salad to be served on the side with a multi course meal as well.

I cook this stir fry with a totally different seasoning and we love it both ways. This one is fragrant with cumin and freshly crushed black pepper corns.


We like this water chestnuts stir fry with prominent notes of cumin if it is for an evening tea time. In this case I add a liberal amount of cumin seeds to the ghee while tempering and stir fry the finely chopped water chestnuts for a little longer time so it gets more aromatic and nutty. A final sprinkling of salt and crushed peppercorns makes the flavours linger on for long. I add roasted peanuts to the same sometimes.

I am sure even you would like this fresh water chestnuts stir fry for a snack or for a breakfast. It is so quick to make once you have peeled singhade.

This series of 101 gluten free breakfasts will be an eye opener for many as there are many Indian breakfast recipes that are normally gluten free. All idli and dosas are gluten free, besan ka chilla is a common breakfast in North India and mung ka chilla, pesarettu is eaten almost all over India. Poha is another popular breakfast dish that is naturally gluten free.

Tell me if you still find it difficult to have a gluten free breakfast, I shall try and bring recipes that suit your requirements.


Monday, November 3, 2014

how to use beetroots to make tasty salads? | two salad recipes with beetroots


Beetroot salads are a great way to include this antioxidant pigment rich root vegetable in everyday meals. One can always make smoothies with beetroot or can add it to curries or raitas but a simple salad is more suitable for a meal when you are alone or when you need a good looking salad for an elaborate meal served to family and friends. I have seen huge bowls of salads disappearing in minutes when served to friends or when the both of us make such salads for weekend lunch. So whoever says salads are boring, has never had a good salad I say.The beetroot salads I am sharing today have all the potential to become family favourites as we have had these salads numerous times and even after refrigerating them for a day or two. Even the roasted or boiled beetroots stay well in the fridge if drizzled with some balsamic vinegar or any vinegar of choice. Without vinegar the cooked beets stay well for 4-5 days easily. Keeping them ready to use is a great help when considering beets are so messy to chop and shred.

Top reasons why you should include beetroots in your diet everyday...
  • Beetroots lower blood pressure owing to the presence of Nitrates in them which converts to Nitric oxide in the body and dilates and relaxes the blood vessels.
  • Beetroot consumption is known to enhance stamina by the action of Nitrates as well as betaines found in them.
  • Betaines help fight inflammation in the body too, good for heart health and overall fitness and performance.
  • The pigment profile of beetroots makes it a good anti-carcinogenic, the anti-oxidant property helps the body take care of ageing and wear and tear.
  • Beets are rich in essential minerals, fiber and immune boosting Vit C, and B Vit folate, great for healthy skeletal system and internal organs.
  • Beetroot helps cleanse the system and make the liver and GI tract healthier.


How to make salads more balanced nutritionally...

  • A great salad would always include ingredients that pair well taste wise and their nutrient profile is complementary. All the ingredients should contribute nutrients in a way that it helps better absorption into the system. 
  • Like if one ingredients is iron and calcium rich, there should be some other ingredient that is rich in Vit C as the minerals wont be absorbed in the absence of Vit C. 
  • Likewise if there are antioxidant pigments of the carotene family thee should be some fat (oil) dressing in the salad or in the same meal, as all such antioxidants and Vitamins are fat soluble and would be wasted if you did not add any oil or natural fat like Avocados or coconut.  
  • Adding nuts or cheeses to such salads makes sense in adding protein as well as good fats to improve the nutrient profile of the salads.
  • Adding cooked chicken breast or fish or bacon is a good idea to bring more proteins and healthy fats into the salads. Add moe greens like lettuce, rocket or baby spinach or micro greens in such salads to make them tastier and Vitamin rich.
  • Lime juice and tamarind extract are great for the acidic ph that helps absorption of many minerals. Yogurt or buttermilk dressing also serve the same purpose while vinaigrette is more common in salads.


I must add if you find the salads insipid with the available ingredients, just whiz everything up and make a smoothie. Like this beets, black grapes, amla and ginger smoothie is yummy and nutritionally balanced as well.


recipe of beetroot papaya salad with feta cheese...

I tried this recipe once when the papaya I had bought turned out to be very insipid in taste. I found the balsamic pickled beets added the much needed flavour to the papaya and pomegranate seeds brought the much needed texture. I Used some home made feta cheese and rocket leaves from the garden and this salad was an instant hit. The salad has been a frequent weekend lunch for us since then.


ingredients
(2 large meal servings or 4-6 as a salad on the side in an elaborate meal)

cubed papaya 2 cups
**pickled beets 3/4 cup or a bit more
pomegranate seeds 3/4 cup
cubed feta cheese 1/2 cup (replace with 3 tbsp chopped roasted almonds or walnuts of you don't get feta cheese)
orange segments 1/2 cup
kala namak (black salt) 1/4 tsp
table salt 1/4 tsp or less
ginger juice 1 tbsp
rucola, arugula or baby spinach a handful (or just use mint leaves)

**To make pickled beets I just cook the beets in microwave, chop them in small slices and douse them with a little salt and a generous pouring of balsamic vinegar. It keeps well in the fridge for a month or more. I use the pickled beets for many salads or just as it is.

procedure..

Just toss everything together and mix well. Add the pickling liquid of the beets as well. Serve after 10 minutes so the flavours get some time to mingle. This salad stays well for a day or two in the fridge, but everything will look deep pink after a while. 


recipe of beets, pumpkin and sweet potato salad with a south India tadka dressing..


I used pan grilled pumpkin and sweet potatoes along with microwave cooked beetroot slices for this salad. Once the cooking of the vegetables has been done the salad can be put together in seconds. 

ingredients

(for 2 servings)
2 thinly sliced pumpkin wedges (300 gm)
2 small thin sweet potatoes (100-120 gm)
one large beetroot (120-150 gm)
hung curd (full fat or 3%) 1/2 cup (about a cup of fresh yogurt used)

for tempering dressing..
curry leaves 3 springs
urad daal (split and skinned black beans) 2 tsp
mustard seeds 1/2 tsp
asafoetida (hing) one pinch 
broken dry red chillies 2
sesame oil 2 tsp 

procedure

Pour the yogurt in a fine mesh strainer (or lined with muslin) and prop it over a bowl. Keep this hung curd contraption in fridge. It takes about 3 hours minimum to get hung curd but it stays well in the fridge for 2 days. Keep it ready to use.

Peel, cut into half and microwave the beets for 3 minutes. Chop in bite size pieces and cool down.

Clean the sweet potato, retain the skin but remove any blackened skin. Slit lengthwise and keep aside.
Clean the pumpkin slice, retain the skin and keep aside.
Heat a skillet, brush with butter or oil and arrange the pumpkin slices and sweet potato halves on it, sprinkle salt and cover to cook on medium heat. Turn and cook on the other side for 3-4 minutes or till both sides are lightly charred (browned) and the flesh is soft (but not mushy).
Remove from pan and chop in small bite size pieces. Cool.

Now mix the beets, pumpkin and sweet potato pieces. Now invert the hung curd over the vegetable mix. Now you can actually mix the yogurt with the vegetables but it will get pink immediately. So I keep the hung curd like this till we actually eat this salad. Looks good too.


Now is the time to make the tempering dressing. Heat the oil and tip in all the tempering ingredients. Let them get aromatic and then pour everything over the disc of hung curd.

Let it sit till the salad reaches the table. Mix it when you want to eat it. Mixing it on lightly the table is an exciting activity as I find people getting curious about it.


I was very skeptical about Arvind's choice as he wont eat pumpkin so easily in a salad. He loves his kaddu ki subzi but would think twice before picking up kaddu (pumpkin) is a salad. I didn't tell him when I made it for the first time. He could recognize only sweet potatoes and beets in this salad and when I told there is kaddu in it too, he exclaimed Oh Yess... and picked up another fat piece of kaddu :-)
 We are a salad couple now. There is a salad meal almost 3-4 times a week and we both love it. Although I keep making some quick salads for myself in the day time and eat them all alone too. Can't live without vegetables even though I eat so many other things too.

Hope you like these two different types of beetroot salads and try them in your own kitchen. Please do let me know if you like beetroots a bit more after trying these salads..

Cheers.


Healthy Way powered by blogger.com
Design by Free7 Blogger Templates Simple Clean